


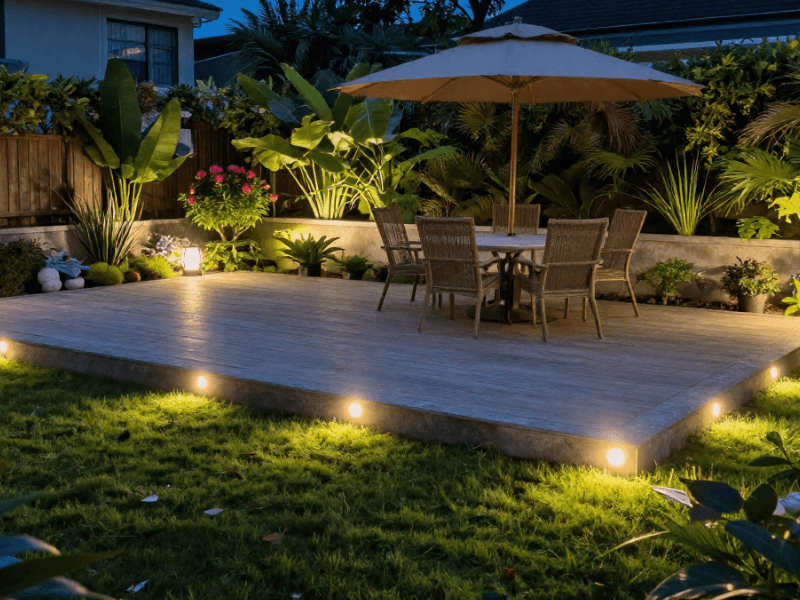


You shouldn’t need a torch just to stroll through your own garden. Yet here we are.
Garden path lighting usually fixes that problem fast. It will also make your garden look far more put-together (even if the lawn disagrees).
Done properly, it can improve safety, add atmosphere, and extend how you use the space. Bungle it, and you’ll wind up with glares, dark patches, and deep regret.
This guide is designed to help you keep things practical. You’ll learn what to choose, where to place it, and how to avoid common mistakes. Let’s get cracking!
Why Garden Path Lighting Matters
Good lighting does more than help you see. It shapes how your garden works and feels. Get this right, and everything else becomes easier.
Safety Comes First (Even If It’s Not Exciting)
Let’s not overthink this! If people cannot see the path, they will misstep.
UK gardens somehow took this difficulty up a notch:
- Wet slabs get slippery fast
- Gravel shifts underfoot
- Frost turns everything into a hazard
With proper lighting, you’ll:
- Define edges clearly
- Highlight steps and level changes
- Reduce harsh shadows that hide obstacles
A common mistake is placing lights too far apart. That creates dark gaps, which defeats the point of having lighting entirely.
It Creates Structure (Not Just “Nice Lighting”)
Lighting is not merely for decoration. It can also offer structure, guiding your eyes.
Without it, your garden flattens into darkness. With it, you can:
- Guide movement along paths
- Separate areas like seating and planting
- Highlight textures and features
Think of lighting as layout support, not an afterthought.
It Extends How You Use the Space
Without lighting, your garden has opening hours. And they tend to close early.
By adding quality lighting, you’ll suddenly enjoy:
- Paths that feel usable at night
- Seating areas that stay relevant
- A space that feels larger
So you see, you don’t need more garden. You simply need better visibility.
UK Conditions Demand Better Lighting
British weather can be quite cruel; you’ll constantly deal with:
- Persistent rain
- Cold and frost
- Dirt and leaf buildup
That’s why your lighting needs to keep up. If they’re not built for the UK’s climate, they’ll fail quickly. And usually, it’s during moments when you actually need them.
Choosing the Right Garden Path Lighting
Now before you buy anything, you need to match the lighting type to your space. Not all available products will work for you, despite what the packaging suggests.
Solar vs Wired Path Lights
Convenience vs performance. This is usually the first decision. Choose based on how you plan to use the space.
Solar Lights: Convenient, Not Consistent
Solar lights are the easy option. No cables, no stress.
They work best when:
- The area gets direct sunlight
- You want decorative lighting
- You prefer a quick setup
But let’s be honest:
- Winter output drops a lot
- Brightness is inconsistent
- Batteries degrade over time
They are fine for ambience. Not so much for visibility.
Wired Lights: Proper Lighting, Done Properly
Wired lighting requires effort up front. But it delivers reliable results.
They’ll give you:
- Stable brightness all year
- Better coverage across long paths
- Integration with timers or smart systems
They’re ideal for:
- Main pathways
- High-use areas
- Homes where lighting needs to perform
If you want lighting that actually works every night, this is the safer bet.
LED Options and Colour Temperature
Once you choose the system, the next decision is light quality. This affects both function and mood.
LEDs are standard because they:
- Use less energy
- Last longer
- Stay consistent
Warm White (2700K–3000K)
- Soft and comfortable
- Reduces glare
- Suits natural materials
Best for relaxed, ambient spaces.
Cool White (4000K–6000K)
- Bright and crisp
- Improves visibility
- Feels more modern
Best for functional paths and clear visibility.
Natural White (3500K–4000K)
- Balanced and neutral tone
- Shows colours more accurately
- Sits between warm and cool lighting
Best for paths needing both ambience and clarity.
Avoid Mixing Randomly
This is where many setups go wrong.
Mixing colour temperatures without a plan creates:
- Patchy lighting
- Visual inconsistency
- A messy overall look
Pick a tone and stay consistent.
IP Ratings and Durability
Outdoor lighting is not just about looks. It also has to survive real conditions.
What the Ratings Mean
- IP44 - Basic splash protection
- IP65 or higher - Strong protection from water exposure
What You Actually Need
For UK gardens:
- Sheltered areas → IP44 works
- Open paths → IP65 or higher is safer
Why This Matters
Ground-level lights deal with:
- Splashback from rain
- Soil moisture
- Debris buildup
Low-rated lights fail faster. And replacing them gets old quickly.
Garden Path Lighting Ideas for Every Style
After you finish sorting out the technical stuff, you can focus on design. This is where lighting starts to elevate the space.
Modern Minimalist Paths
This style is all about control and precision. Every light has a purpose.
For best results, use:
- Recessed edge lighting
- Slim spike lights
- Clean, even spacing
Keep brightness controlled. Too much light ruins the look instantly.
Rustic and Natural Garden Paths
Here, lighting should blend into the environment rather than compete with it.
You should focus on:
- Warm tones
- Low brightness
- Hidden fixtures
For optimal results, use:
- Wooden or dark-finish stakes
- Soft solar LEDs
- Lighting tucked into planting
If the fixture stands out, it is doing too much.
Decorative and Statement Lighting
This is where you can add personality. Just don’t overdo it.
For starters, try:
- Lantern-style lights
- Feature lighting for focal points
- Subtle colour-changing LEDs
Stick to one or two standout features. Too many, and it starts looking chaotic.
Layered Lighting for Safety and Ambience
If you want your garden to look well-designed, layering is key. One light type rarely does enough.
Try combining:
- Path lights for direction
- Spike lights for planting
- Wall lights for structure
This approach will help you:
- Reduce dark spots
- Add depth
- Balance function and style
Flat lighting feels basic. Layered lighting feels intentional and sexy.

Installation Tips for Garden Path Lighting
Installation is where most setups fall apart. Rush this, and you’ll get glare, dark gaps, and that lovely “why does this look off?” feeling. And no, good lights won’t save a bad layout.
Plan Before You Touch the Soil
Start with how people actually move through your garden, not how you think they do.
Map out:
- Main walking paths
- Steps, turns, and awkward corners
- Entry and exit points
Spacing matters more than you expect.
- 1.5 to 2 metres works for most setups
- Closer for dim lights
- Wider only if the lights are bright enough
Avoid lining lights directly opposite each other. That creates a runway effect. Great for airports, not your garden.
Solar Lights: Easy, But Not Foolproof
Solar lights are simple. Until you put them in the wrong place.
To get decent performance:
- Place them in full sun, not “sort of sunny”
- Keep panels clean and angled slightly upward
- Avoid areas shaded by fences or trees
Push spikes into firm soil, not loose mulch. Otherwise, they lean. And nothing says “unfinished” like crooked lighting.
Wired Lights: Do It Properly or Don’t Bother
Wired lighting needs more effort, but it rewards you with consistency.
When setting up, you should:
- Plan cable routes first
- Dig shallow trenches (about 5–10 cm)
- Use waterproof connectors
- Keep cables neat and protected
Do not leave connections exposed. Water will find them. It always does.
If this feels like too much work, that’s fair. Just don’t half-do it.
Test at Night (Not in Your Head)
This is the step people skip (and later regret).
At dusk:
- Turn everything on
- Walk the full path
- Look for glare and dark spots
Adjust angles and spacing as needed. Small tweaks make a big difference.
If it looks good in daylight, that means nothing. Night is where it counts.
Maintenance Tips for Long-Lasting Path Lighting
You installed your lights. They look great. Job done, right?
Not quite!
If you ignore maintenance, even the best setup turns into a dim, flickering mess faster than you’d like.
Clean the Solar Panels (Yes, Really)
Solar lights rely on sunlight. Obvious, but you’d be surprised how often this gets ignored.
Dirt, dust, and leaves can block charging. Even a thin layer can make a difference!
So here’s what to do:
- Wipe panels every few weeks
- Clear off leaves after windy days
- Give them a proper clean before winter
If your solar lights fade early, these are usually the culprits. Not the brand. And definitely not the weather.
Replace Batteries Before They Give Up
Rechargeable batteries don’t last forever. They just slowly disappoint you. Their typical lifespan ranges from around 12 to 24 months.
Here are the signs that they need replacing:
- The lights dim quickly
- They stop working earlier in the evening
- Charging seems inconsistent
Use good-quality replacements, but please don’t mix battery types. That’s just asking for uneven performance.
Check Wiring and Connections (Before They Fail)
In wired systems, small issues can escalate if ignored.
So keep an eye on:
- Loose connections
- Signs of water ingress
- Damaged or exposed cables
Fix problems as soon as you spot them. Either you spend minutes now or hours (even days) later. Your choice. And no, “it still works” is not a maintenance strategy.
Keep Fixtures Clear and Upright
Outdoor lights deal with shifting soil, plant growth, and general garden chaos.
You need to regularly:
- Straighten tilted spike lights
- Trim plants blocking the light
- Remove dirt buildup around fittings
Crooked lights and blocked beams ruin the effect. It ends up looking accidental rather than designed.
Stay Ahead of the Seasons
Your garden will change constantly, so make sure your lighting does, too
- Autumn - Clear leaves before they pile up
- Winter - Check for frost damage and water buildup
- Spring - Clean everything and reset positions
- Summer - Trim plants that start blocking light
Maintenance isn’t always glamorous. But it can actually spell the difference between lighting that lasts and lighting you replace every year.
FAQs
How far apart should path lights be?
There’s no perfect number, but there is a sensible range.
Start with 1.5 to 3 metres apart. Then adjust based on:
- Brightness of your lights
- Width of your path
- How evenly you want the light spread
Too close, and it looks like a runway. Too far, and you’re back to guessing where the path is. Test it at night. Your eyes will give better feedback than any guide.
Can I mix solar and wired path lights?
Yes, and you probably should.
Use wired lights where visibility matters most. Think main paths and steps.
Then add solar lights for decorative areas or spots that get good sunlight.
By doing this, you’ll get reliability where you need it and convenience where you don’t want the hassle. A rare win-win.
Do LED lights work well in wet UK conditions?
Yes, as long as you pick the right ones.
Look for IP65 or higher for exposed areas. That means they can handle rain without slowly giving up on life.
Lower ratings might survive for a while. But as soon as one rainy week hits, half your path will suddenly be in darkness. Not ideal.
How do I create a layered lighting effect?
Layering sounds fancy. But to tell you the truth, it just means using more than one type of light.
Try combining path lights, spike lights, and wall/feature lights. Doing this will help you avoid flat lighting and add depth.
Remember:
- One light type = basic
- Layered lighting = you actually planned it
Why do my path lights look too bright or too harsh?
This usually comes down to placement and angle, not the light itself.
Common causes include:
- Lights pointed directly at eye level
- Using cool white where warm would work better
- Over-lighting a small path
You can fix these by:
- Tilting lights downward
- Spacing them out more
- Switching to a softer colour temperature
If your garden feels like a car park, you’ve gone too far. Tone it down.

Don’t Be Left in the Dark; Light Your Garden Right
Good garden path lighting is not just about throwing lights everywhere and hoping for the best. It also involves smart placement and the right choices.
Focus on what matters:
- Clear visibility where people walk
- Consistent spacing without dark gaps
- Durable fittings that handle UK weather
Get these right, and everything works. Get them wrong, and it shows.
For reliable options that last, explore Simple Lighting’s garden path range.
And don't forget to read more on posts like this one by checking out our Complete Guide to Garden Lighting.


0 comments